Wednesday, 31 May 2017

Learning a new skill!

Shibori dyeing
Shibori dyed fabric


I took part in a two day course learning a new dyeing technique namely Clamp Resist Shibori, a Japanese way of dyeing patterns onto fabric which can be highly decorative and very complex. As it takes a few hours for the dye to take, I was able only to make a few samples but got a good overview of the technique. Different ways of folding and pleating the fabric determines what the finished pattern will be, almost like origami!

Soaking clamped fabric
Pre soaking fabric before dyeing

After folding and pleating, the folded fabric is held in place with plastic or wooden shapes with clamps. This is to stop the dye which will be applied from penetrating the folds so there will be undyed areas. Once soaked in water, the clamped fabric can be immersed in dye or spooned on. There's an element of surprise as to how each piece turns out but that's the best bit! 

I was thinking of using this technique to make some scarves for the Christmas market, I'm selling at. Have to think ahead, as always! 
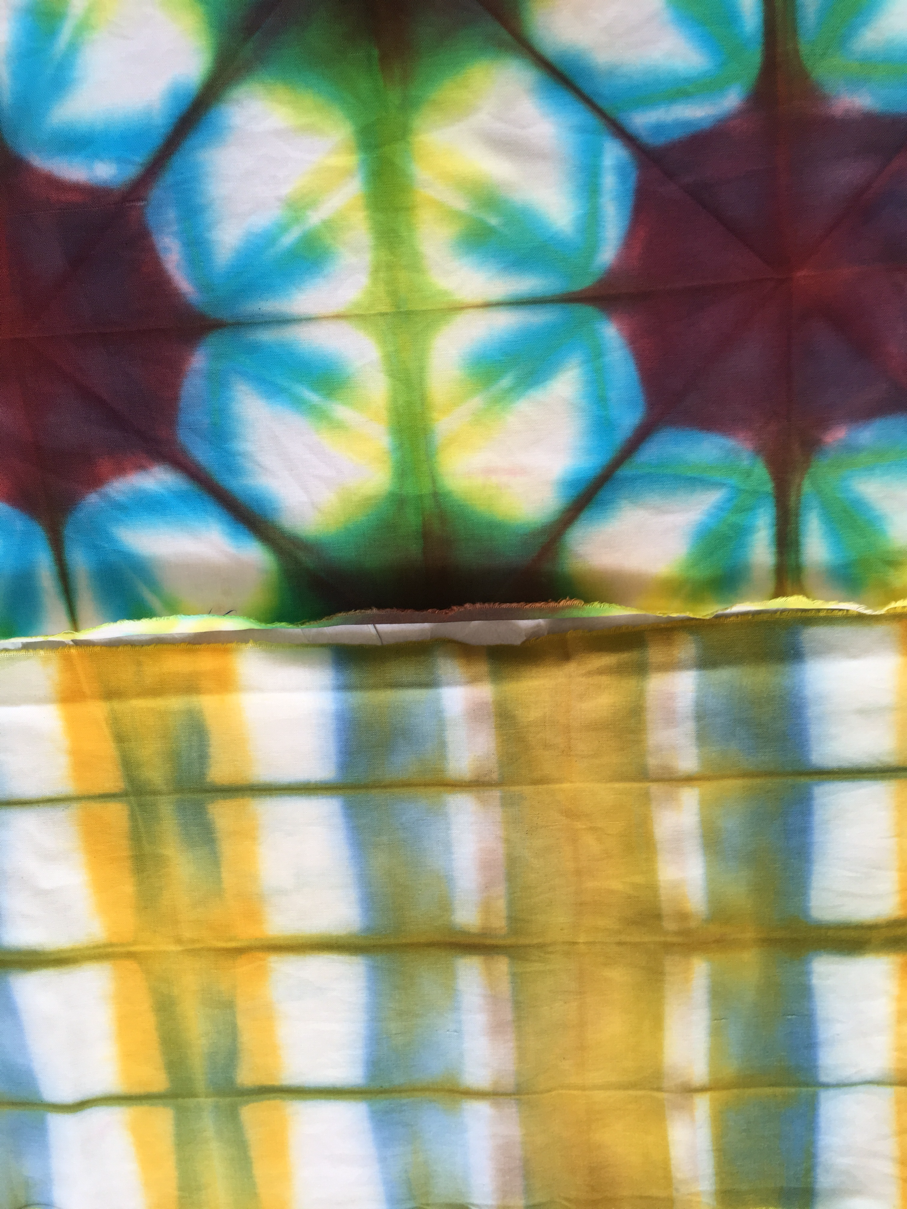
Radial shibori
Radial pattern


Degumming lamé fabric
Stripping metallic thread from lame
After declamping
Unclamped fabric, dyed and before unfolding for the reveal!
  
Shibori dyed fabric
Students work
Student examples
Students work
Student example
Students work
Degummed organza
Students work
    

Friday, 21 April 2017

River of the sky

 River of the sky- wall hanging
River of the sky. 2017. 93cm x 60cm

I'm going to highlight a larger piece of work that I recently shown at the textile fair last month. It's the largest stitched piece I have made to date which is sometimes a bit of a gamble to dedicate so much time to one project. An expansion on an earlier piece I made a few years ago, Backbone of the Night, the Milky Way is the theme and both of their title names refer to that.

There is a lot of handstitching involved which of course, is extremely time consuming but more effective because of it. I couldn't even begin to tell you how many stitches there are! 


For the sewing enthusiasts, I've used a combination of threads made from cotton, linen and silk, all different textures and some hand dyed. 

I like to use vintage fabrics in my work as part of the "boro" aesthetic of patching and mending. It also fits nicely into the the notion of the universe continually regenerating itself. 


Techniques employed are dyeing, painting, cyanotype printing, some machine stitching but mainly hand embroidered.
 

Tuesday, 28 March 2017

Contemporary Textile Fair 2017


Back again to the beautiful Landmark Arts Centre for this year's Contemporary Textile Fair. I return here each year because it has a lovely atmosphere and attracts a good audience of textile enthusiasts to sell and chat to.

As well as the framed textile pieces which sell well, I made a showstopper of a wall hanging. It's always good to have a large piece to attract attention and draw in the crowds. Though I do get a bit anxious when its feels that my hand stitching is being scrutinised by others who stitch themselves!

There were lots of other talented artists and makers showing this year, but I managed not to buy anything for myself which is really difficult as there's lots of temptation! After all, I'm there to sell..

I will be back at the same venue in October for the Landmark Autumn Art Fair. I haven't exhibited my work before amongest other forms of fine art so will be exposed to a different audience. Hopefully, textile art will be appreciated as it does tend to be undervalued and not represented at a lot of art venues. It's that fine line between being seen as art or craft. Time to change that perception!


Wednesday, 18 January 2017

Building up


Over the past couple of months, I have been building up a body of work for the Contemporary Textile Fair I will be showing at in March. Furthering my use of cyanotypes, I've been looking a ways to incorporate them in my work.


Wednesday, 19 October 2016

Cyanotype short course


Though I taught myself cyanotype printing, there is always an opportunity to learn from someone else new skills. There was a short 2 day course at a nearby college on cyanotypes so I jumped at the chance to improve and learn some more about this wonderful early printing technique. 

Having only used cotton fabric before I wanted to expand onto different fabrics (though only works on natural fibres) and learn how to change the colour. It was also interesting to use paper which I've never done before.In the past I used images to print, this time I made use of objects such as leaves and feathers.
 A great advantage of going to a college is the use of their fancy equipment and when the sun don't shine, a screen exposure unit is a great substitute. There is a different quality to the images, more predictable and even. With the sun, you can move the image/ object around to get a ghosting effect and also shadows can be cast to give a 3D look.

.

The thing I love about cyanotypes is the brilliant blue colour but you can remove this and tint it with tannin or tea for a sepia tone. There are definitely more ways to experiment with different coloured backgrounds and with other tints and over washes.
The image on the right was printed with natural light, see the shadow the sun cast? You won't get that using UV light.

Feather printed onto canvas using UV light.

Paper & fabric samples using UV light.

The blue is removed then dipped in tea.

Monday, 17 October 2016

New Studio

The place..

Blank space..

Moving in.
Set up!
I've moved into a new studio space.. Having moved around the last couple of months, it became impossible to work from home especially when using paint and dye! So what used to be a faint dream is now a reality, my own workspace :)


My studio is in a artists warehouse by the Thames Barrier in London with lots of other creatives. Having a seperate space from your living arrangements is certainly a good way to knukle down and get to work without other distractions. 

The thing I'm most excited about is being able to pin up all my inspirational images and my own work instead of it being hidden in folders!

Wednesday, 15 June 2016

Update! Contemporary Textile Fair 2016

Heavens, has it been that long since I've updated my blog?

A lot has happened that has kept me more than occupied. Between moving home (twice!), finding a new job and exhibiting at the Contemporary Textile Fair, it's been challenging updating this blog. My instagram feed on the otherhand is the best place to see what I'm making at the moment! 


So, the textile fair at the Landmark Arts Centre was once again a joy to take part in. 

As well as meeting lovely people who are interested in my work, it's great to meet fellow makers and artists and see their work and hear their experiences.

I never take for granted that people are keen to buy and are sometimes surprised when they do! This year's fair was excellent and I'm glad that getting my larger work professionally framed not only took a lot of the workload off me, but looked pretty darn good too. I left the frames unstained for buyers to decide on what they liked for their homes as we all have different tastes. 

Getting postcards printed was also a good idea; a small cost memento to be bought and serves as a excellent business card for me too. I hired an art browser to display my mounted prints and artwork which was a great space saver and easier for viewing. People do love a rummage!

Each exhibition, I find a new way to display my work and try to see how I can capture people's interest. It's always a learning curve! Overall, I was pleased with how my stand looked and it did get a lot of interest. I thought this year's fair had a good steady flow of visitors and there was lots of buying going on which is good for a springtime.

There were some workshops also happening courtesy of the Royal School of Needlework, so that also gave textile enthusiasts an extra reason to come this year.
There is a nice gentle atmosphere to this fair and standalone textile fairs are rare in the art & craft world so this one is to be treasured!